
Water ionizers are becoming increasingly popular for their purported health benefits and versatile uses. If you’ve recently purchased an ionizer, or are considering one, this guide will walk you through everything you need to know, from the varied uses of ionized water to installation and maintenance of the device. So, let’s dive right in!
Exploring the Uses of Ionized Water
While many people buy ionizers to enjoy the benefits of alkaline water, fewer are aware that these machines can generate water for a variety of purposes. Modern ionizers offer several types of water, beyond just the alkaline kind. Let’s explore these uses:
Cleaning and Skin Care with Acidic Water
The acidic water produced by ionizers isn’t just a byproduct—it has its own set of uses! Acidic water is excellent for washing, hygiene activities, and even as part of your makeup routine. The acidic properties can work in harmony with your cosmetics, and it’s also great for washing vegetables and other food products.
Alkaline Water for Drinking and Cooking
The alkaline water from your ionizer isn’t just for drinking—it can be used for cooking as well. This is, of course, the primary function of an ionizing water device—to transform regular water into alkaline water. The benefits of alkaline water are numerous, including:
- Improved cardiovascular function
- Enhanced taste compared to regular tap water
- Superior skin hydration (when applied topically)
- Potential anti-cancer properties (though this is still being researched, and should not replace regular cancer treatments)
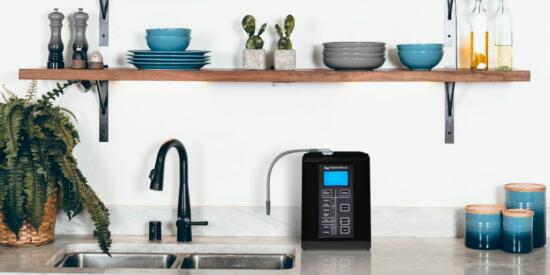
Installing Your Water Ionizer
Don’t be daunted by the thought of installing a water ionizer. It’s a straightforward process that doesn’t require a professional plumber. Here’s a general step-by-step guide for installing most ionizer models:
What You’ll Need
- Adjustable wrench
- Faucet diverter
- Plumber’s tape
- Screwdriver and adapter
The Installation Process
- Find a Spot: Choose a location near your kitchen sink for your ionizer, whether it’s an under-counter or countertop model. Make sure the space is clear and that the ionizer has a permanent place to rest.
- Switch Off Water Supply: Turn off the water supply to avoid any pressure buildup in the pipes during installation.
- Install Faucet Diverter: Follow the instructions in your user manual to install your faucet diverter, which allows you to run water through your ionizer whenever you want.
- Connect the Ionizer Unit: Attach the metal tube to your unit, remove the faucet’s aerator, and make sure the diverter is correctly connected. Secure the inlet elbow to the inlet at your ionizer unit using plumber’s tape and a screwdriver.
- Attach the Ionizer to the Faucet Diverter: Connect one end of the flexible plastic hose to the inlet elbow and the other to the faucet diverter. Connect the final hose to the machine’s outlet hole.
- Connect to Power: If your ionizer is electric, plug it into the power outlet.
- Turn on the Water: Turn your water back on, and then turn on your faucet to direct water into your ionizing system.
With your ionizer, user manual, and perhaps some online video guidance at hand, the installation process should take between 30 minutes to an hour.
Dos and Don’ts of Water Ionizer Maintenance
To ensure the longevity and safety of your water ionizer, here are some important dos and don’ts:
Dos
- Change Filters Regularly: Filters should be replaced every six to twelve months, depending on usage. New filters should be flushed under running cold water for at least 5 minutes before installation.
- Use a Cleaning Cartridge: Regularly clean the interior of your unit using a cleaning cartridge, as per the manufacturer’s instructions. This helps eliminate mold and bacteria.
- Wipe Down the Exterior: To keep your unit looking new, wipe down the exterior at least once a week. A damp cloth or sponge followed by a dry cloth is usually sufficient.
Don’ts
- Avoid Harsh Cleaners: Avoid using harsh household cleaners on the exterior of your ionizer. These could damage the finish and display screen, and cause the labels on the machine’s buttons to fade.
- Don’t Rush the Cleaning Process: If you’re doing an internal cleaning, make sure you have enough time to complete the task thoroughly. This helps prevent a buildup of mold and bacteria, which can affect the quality of your alkaline water and be harmful to your health.
- Follow the Manufacturer’s Instructions: Never invent your own cleaning procedures for a water ionizer. Always follow the manufacturer’s explicit instructions to ensure your alkaline water remains safe to drink.
In conclusion, a water ionizer is a versatile device with a variety of uses. With proper installation and regular maintenance, you can enjoy the benefits of both acidic and alkaline water. Happy hydrating!

Jay
Jay is a health and wellness enthusiast with expertise in water quality and nutrition. As a knowledgeable advocate for holistic well-being, Jay successfully manages Type 2 Diabetes through informed lifestyle choices. Committed to sharing reliable and authoritative insights, Jay combines firsthand experience with a passion for enhancing health."