
Electric water heaters resemble their gas-fueled counterparts in appearance. However, they use a steel storage tank jacket with insulation between the storage tank and the tank jacket to prevent warm water from escaping.
The heat source is the primary distinction between electric and gas water heaters.
Electric upper and lower heating components that extend into the water tank heat the water in an electric water heater. A gas burner heats the water below the tank in a gas water heater.
Electric water heaters that produce little or no heat are usually caused by a faulty heating element, which is cheap and simple to repair.
Other issues may arise due to incorrect settings, excessive household water pressure, or a lack of tank maintenance.
How does it work?
A water heater is a device that heats water and stores it for later use. A home water heater heats water to between 120 and 140 degrees Fahrenheit.
When a hot-water faucet is turned on, hot water flows from the tank’s top to the faucet, and cold water flows into the tank to replace it.
The thermostat detects a dip in water temperature and completes an electrical circuit to the heating components of an electric water heater.
Separate thermostats normally regulate electric water heaters’ upper and lower heating elements.
The thermostats cut off the energy flow to the heating components once the water in the tank reaches the desired temperature.
An anode (magnesium) rod also collects contaminants in the water that would otherwise corrode the metal tank.
Examine the Warranty
Limited warranties are available on both residential and commercial water heaters. A rating plate with the model and serial number is located on each tank. These numbers indicate the year the tank was manufactured and will determine if the tank is covered by a prorated warranty, which may include a new tank or parts for free or at a reduced cost.
If the tank is leaking or the element is broken, take a picture or write down the details and contact the manufacturer. Manufacturer warranties do not cover field labor. This is something you should do before starting to troubleshoot the issue.
Beware!
When the power is on, electric water heaters are high-voltage (240-volt) appliances that are dangerous to operate. Turn off the power to the heater’s circuit by turning off the relevant breaker in your home’s service panel before inspecting any electrical sections of the heater. Before touching any wires in the water heater, ensure the power is turned off with a non-contact voltage tester.
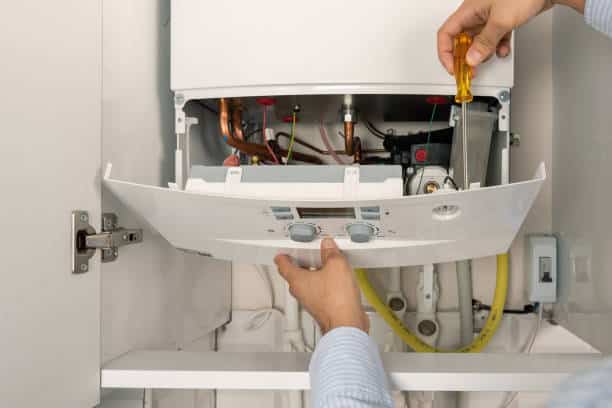
Repair and troubleshooting
Absence of hot water
It’s possible that a water heater that doesn’t produce hot water isn’t getting power, has a tripped limit switch, or has one or more defective heating elements.
How to repair
First, ensure sure the circuit breaker for the water heater hasn’t tripped in the service panel. If the breaker has tripped, turn it off and then on again. If the heater’s breaker did not trip (and it is still on), try resetting the heater’s high-temperature limit:
- In the service panel, turn off the circuit breaker for the water heater.
- Next, remove the access panel for the water heater’s upper heating element.
- Remove the insulation and the plastic safety shield with care, making sure not to touch any wires or electrical contacts.
- Above the upper thermostat, press the red button to reset the high-temperature cutoff.
- The safety guard, insulation, and access panel should all be replaced.
- Turn on the circuit breaker for the heater.
- If it doesn’t work, examine each heating element and, if necessary, replace it.
Insufficient hot water
Your water heater may be too small to fulfill the household’s hot water demand if it produces hot water but not enough. Ensure that the demand does not exceed the water heater’s capacity.
How to repair
Hot water should account for 75% of the water heater’s capacity.
A 40-gallon water heater, for example, is adequate for a 30-gallon requirement. However, if the demand for hot water exceeds the heater’s capacity, take shorter showers, use low-flow showerheads, and do dishwashing and laundry at different times of the day rather than all at once.
One or both of your heating elements may have failed if your unit is not undersized and generates less hot water than it used to.
A steady supply of lukewarm water during a shower indicates a faulty upper heating element. Hot water running out quickly during a shower indicates a faulty lower heating element.

The water is too hot.
It’s equally as frustrating to have too much hot water as it is to have too little hot water. If you have this problem, one or both of your water heater’s thermostats may be set too high.
How to repair
To double-check your thermostat settings:
- Then, in the service panel, turn off the electricity to the water heater.
- Remove the water heater’s access panel, insulation, and plastic safety shield from each heating element. No wires or electrical terminals should be touched.
- Using a non-contact voltage tester, check the cables to ensure the power is turned off.
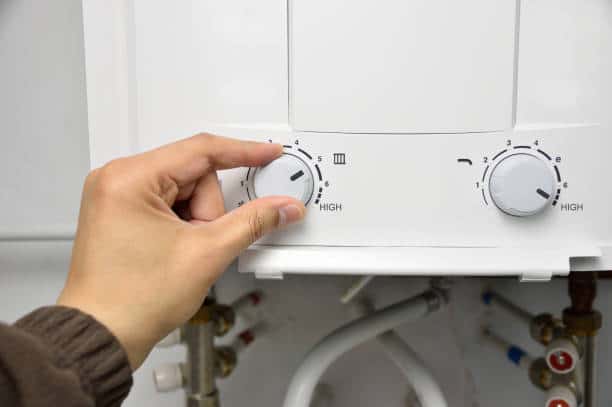
- Check both thermostats’ heat settings: they should be set to the same temperature. The temperature should be set between 115 and 125 degrees Fahrenheit.
- Using a flathead screwdriver, adjust the temperature to the appropriate level.
- Set the other thermostat to the same temperature as the first.
- For each element, replace the safety guard, insulation, and access panel.
- Turn on the circuit breaker for the heater.
Water leakage
Leaking valves and plumbing connections are the most common causes of water leaks, although tank issues can also cause them. Water leaks can cause serious damage to a home, so getting the leak fixed as quickly as possible is critical.
How to repair
Water heater tank leaks can be caused by loose heating elements or tank corrosion. Inspect the elements for looseness and tighten them with an element wrench if necessary.
It is impossible to restore a rusted tank, so it must be replaced. First, turn off the water heater’s electricity and supply, then drain the tank to halt the leak.
Water with a rusty hue or a foul odor
If your water has a brown, yellow, or red hue when it comes out of the faucet, corrosion may be present inside your water heater tank or in your home’s pipes. In addition, there could be bacteria in the water heater tank if your water smells like rotten eggs. You may need to replace the anode rod in the tank, which usually requires a professional plumber’s assistance.

Tank noise
Is your water heater making strange noises? Do you hear a deep rumbling or popping sound? Is it a high-pitched whine, perhaps? The sound you’re hearing may be the sound of boiling water. Excessive sediment building in the bottom of the tank might cause the bottom to overheat, resulting in the water boiling.
How to repair
The first approach to try is to drain the tank to get rid of the sediment. If it doesn’t work, the tank may need to be replaced.
Bad odor
A buildup of germs in the tank causes this. It’s possible that flushing the tank will work. It may also be beneficial to replace the anode rod with a different type of metal.
How to change the hose on a water heater
Before attempting to replace a water heater hose, you should have some basic plumbing understanding. If you don’t take the proper precautions, your home could be flooded in minutes.
- Turn off the water to the water heater before you start loosening connections.
- After you’ve turned it off, test it by turning on a few hot water faucets and ensuring there’s no water flowing out of them.
- You can now start changing the part. Remove the leaking hose first. Some hoses can be disconnected with pliers or a wrench. However, you must have the correct type of hose connectors for this to function. If the hoses are soldered together, you’ll have to cut the pipe and disconnect the hose. If you have soldered fittings, you can join the replacement hose using a compression fitting or by soldering it back on. If you’ve never soldered copper piping before, don’t try it and leave it to the professionals instead.
- You can reopen the inlet water valve to the heater once you’ve connected your hose. Just make sure you have a faucet valve open someplace in the house to relieve some of the pressure.
Checking the thermostat and heating elements
Even though there are numerous articles on the internet explaining how to check the heating elements, I have only seen one or two that explain how to do it properly.
- Check the breaker box for a tripped breaker before you start dismantling access panels and other things. Then, let’s move on to the next step if the breaker is good.
- You’ll need a multimeter with the ability to check ohms or continuity.
- Ensure the water heater has enough power: there should be two 120-volt wires running into the unit. If you aren’t getting a full 240 volts, there is a problem with the breaker, which may require replacement. If you have no experience working with electricity, do not do it because it is far too risky. Instead, get a professional or someone with prior experience to assist you. Assuming the water heater is powered by 240 volts, we’re set to go, so let’s test the heating elements and thermostat.
- Remove the access panels, which are normally held in place by a few hex-head screws. First, locate the thermostat and remove any insulation obstructing it. Next, look for a small red button that is off if the thermostat has been tripped. In most cases, pushing the button back in will solve the problem, but the thermostat will need to be replaced if it simply pops out when the power is turned back on.
- You must now turn off the electricity to test the thermostat and the water heater element!
- Take one of the thermostat’s wires out. You can eliminate all of them if you like, but only one of them is required. Set your multimeter to ohms, then place one of the probes on the first screw, the one that isn’t wired. Holding that in place, test each screw and connection with the second probe.
- If your meter reads “.1”, that signifies the circuit is open, which is good because it means your thermostat or element is working properly. If your meter reads “.003,” it will eventually decrease to zero, indicating that the circuit is closed and that you will need to replace the thermostat or the element.
- Replace the thermostat if it is broken. Because you’ve already turned off the power, connect the new one in the same manner as the old one and adjust the temperature accordingly. If the heating element is broken, replacing it is a little more complicated.
How to replace the element in a water heater
As mentioned in the previous paragraph, you should have already tested the element. So let’s get started once you’ve confirmed that the element is bad.
- Turn off the water heater’s power and the water supply.
- Many advise draining the water heater before replacing the element. This can be accomplished by connecting a garden hose to the drain valve and siphoning the hose’s end to generate a vacuum. Then you wait for it to drain for 30 minutes to an hour. You might also open up other hot water valves throughout the house to ensure it’s gone. You can do all of this yourself, or you can listen to me and save an hour while avoiding the draining: Gather a few towels and drape them over the water heater. Some water will come out when you pull the element out, but it is not pressurized, so if you swap the elements out fast, there will be very little water on the floor or carpet.
- Disconnect a few wires on the old element. To loosen the element, you’ll need the right size lug wrench. Next, make sure you have a new heating element available. These elements come with a rubber o-ring so that you won’t need Teflon tape.
- Remove the old element by unscrewing it and pulling it out. If you don’t drain, some water will be gushing out, so make the change quickly. Then tighten the new element. Connect the wires in the same way they were before. Replace any insulation that has been removed, as well as the access panel.
- You’re done once you’ve turned on the water heater’s breaker and turned on the water.
Draining an electric water heater reservoir
- Shut off power at the electrical service panel and place a sign alerting others not to turn it on to drain an electric water heater tank.
- Close the cold-water supply valve and turn on a hot-water faucet in a different room of the house to speed draining up.
- Connect the drain valve to a garden hose and run it outside the house.
- Allow all water to drain away by opening the drain valve.
- Close the drain valve tightly and open the cold-water supply valve to refill the tank. Open a neighboring hot-water faucet as well. The tank is full when a constant stream of water pours from that faucet, and the faucet can be closed.
- Reconnect the electrical power once the tank is full.
Final thoughts
And there you have it! Before calling a professional, you can try the methods in this article. Remember, safety comes first. Best of luck!

Jay
Jay is a health and wellness enthusiast with expertise in water quality and nutrition. As a knowledgeable advocate for holistic well-being, Jay successfully manages Type 2 Diabetes through informed lifestyle choices. Committed to sharing reliable and authoritative insights, Jay combines firsthand experience with a passion for enhancing health."
